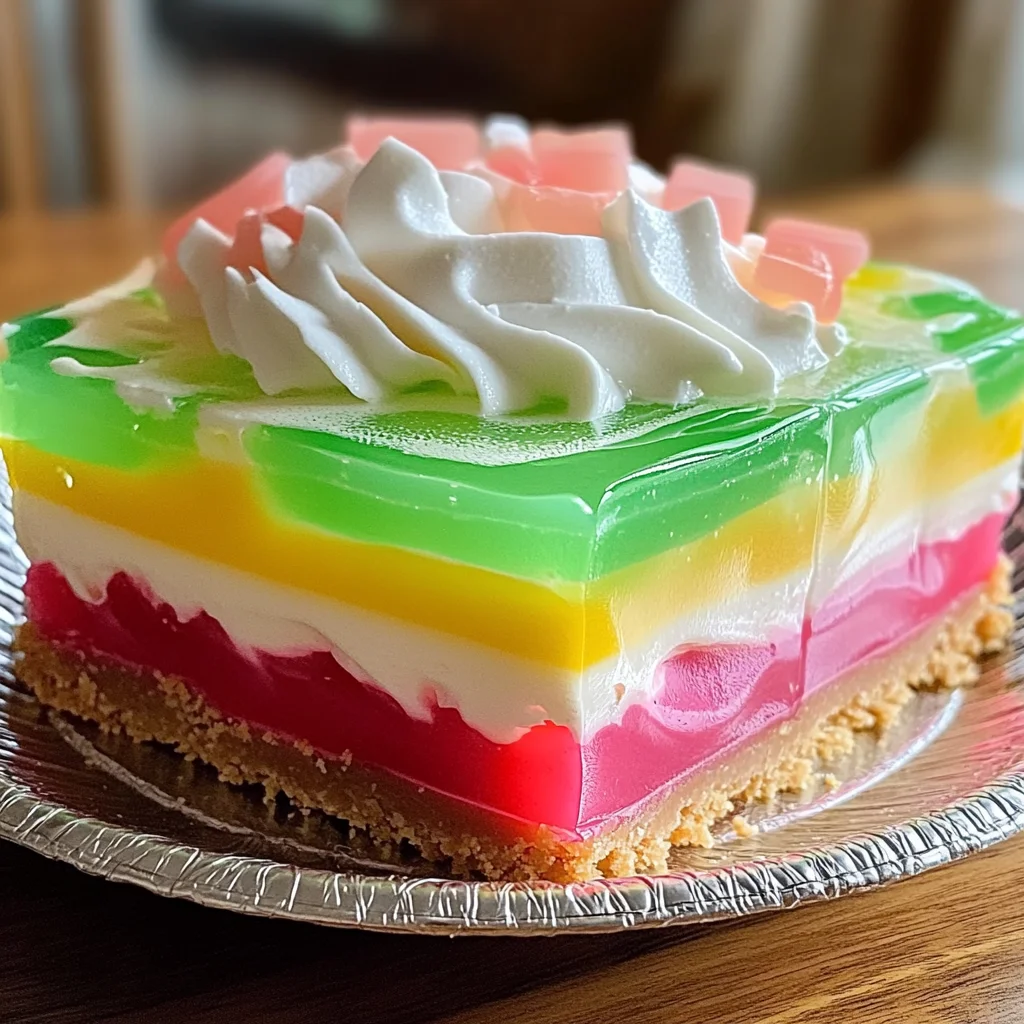
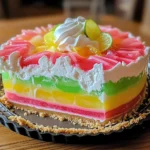
Easter No Bake Jello Pie
Easter No Bake Jello Pie is a delightful treat that brings vibrant colors and refreshing flavors to your spring celebrations. This easy-to-make dessert is perfect for Easter gatherings, family picnics, or any occasion where you want to add a fun, festive touch. The combination of creamy layers and fruity Jello makes it a hit with both kids and adults alike. Plus, it’s a no-bake recipe, so you can save time in the kitchen while still impressing your guests!
Why You’ll Love This Recipe
- Easy to Make: This recipe requires no baking, making it simple and quick to prepare.
- Colorful Layers: With various Jello flavors, each slice is visually stunning and sure to delight.
- Creamy Texture: The smooth cream cheese layer adds richness that balances the fruity Jello perfectly.
- Versatile: You can mix and match flavors based on personal preference or seasonal availability.
- Perfect for Celebrations: Ideal for Easter but great for any festive occasion throughout the year.
Tools and Preparation
To create your Easter No Bake Jello Pie, you’ll need some essential tools to make the process smooth and efficient.
Essential Tools and Equipment
- Mixing bowls
- Electric mixer
- Measuring cups
- Spatula
- Refrigerator
Importance of Each Tool
- Mixing bowls: These are essential for combining ingredients without spilling or mixing them inappropriately.
- Electric mixer: It helps achieve a smooth and fluffy cream cheese layer quickly, saving you time and effort.
- Spatula: Perfect for spreading layers evenly without disrupting the pie’s delicate structure.
Ingredients
For the Crust
- Grachicken chicken ham Cracker Crust: (1 pre-made 9-inch crust or ingredients to make your own) Provides the perfect base for the creamy filling and jello layers, offering a delightful textural contrast.
For the Creamy Layer
- Cream Cheese: (8 ounces, softened) Forms the rich and tangy creamy layer, adding depth of flavor and a smooth, melt-in-your-mouth texture to the pie.
- Granulated Sugar: (1/2 cup) Sweetens the cream cheese layer, balancing the tartness and enhancing the overall flavor profile of the pie.
- Vanilla Extract: (1 teaspoon) Enhances the sweetness of the cream cheese layer and adds a subtle, warm aroma to the pie.
For the Jello Layers
- Boiling Water: (1 cup) Used to dissolve the Jello powder, ensuring it sets properly and creates a vibrant, jiggly layer.
- Cold Water: (1 cup) Added to the dissolved Jello to cool it down and help it set faster, contributing to the pie’s signature texture.
- Jello (Various Flavors and Colors): (2 small boxes, 3 ounces each; assorted colors like lemon, lime, raspberry, or strawberry) The star of the show, providing vibrant color, fruity flavor, and that iconic jiggly texture that makes this pie so fun and festive.
For Topping
- Whipped Topping: (8 ounces, thawed) Adds a light, airy finish to the pie.
- Optional Easter Candies or Sprinkles: For decoration to add extra Easter flair.
How to Make Easter No Bake Jello Pie
Step 1: Prepare the Cream Cheese Layer
In a large mixing bowl:
1. Beat softened cream cheese with an electric mixer until smooth and creamy. This ensures there are no lumps.
Step 2: Sweeten and Flavor the Cream Cheese
Gradually add granulated sugar:
1. Continue beating until light and fluffy.
2. Mix in vanilla extract until evenly distributed.
Step 3: Prepare the First Jello Layer
In a separate medium bowl:
1. Empty one box of Jello powder into a bowl.
2. Pour in 1 cup boiling water; stir continuously until dissolved.
Step 4: Cool the First Jello Layer
Add cold water:
1. Stir gently until combined to cool down mixture.
Step 5: Pour the First Jello Layer
Carefully pour half of prepared Jello mixture into crust:
1. Use half at this stage for distinct layers.
Step 6: Chill the First Jello Layer
Refrigerate:
1. Chill for about 30-45 minutes until partially set but still slightly jiggly.
Step 7: Spread the Cream Cheese Layer
Once first layer is set:
1. Gently spread cream cheese mixture evenly over top using a spatula.
Step 8: Chill the Cream Cheese Layer
Return pie:
1. Chill for another 30-45 minutes until firm enough for next layer.
Step 9: Prepare the Second Jello Layer
While chilling:
1. Repeat steps 3-4 using second box of different flavor/color Jello.
Step 10: Pour the Second Jello Layer
Once cream cheese layer is firm:
1. Carefully pour remaining Jello mixture over cream cheese layer slowly.
Step 11: Chill the Pie Completely
Refrigerate:
1. Chill for at least 4-6 hours or overnight for best results.
Step 12: Decorate and Serve
Before serving:
1. Spread whipped topping over top evenly.
2. Decorate with optional candies or sprinkles.
3. Slice chilled pie before serving! Enjoy!
How to Serve Easter No Bake Jello Pie
Easter No Bake Jello Pie is a delightful treat that can be served in various ways to elevate your festive gathering. Here are some fun serving suggestions to enhance its presentation and enjoyment.
Individual Portions
- Serve in small cups or jars for individual servings. This allows guests to enjoy their own personal pie without needing to slice it. It’s also a cute presentation for parties!
Topped with Fresh Fruits
- Add a mix of fresh fruits on top, like sliced strawberries or blueberries. This not only adds color but also enhances the fruity flavors of the Jello layers.
Drizzled with Fruit Syrup
- Consider drizzling fruit syrup over each slice just before serving. A berry or citrus syrup can add an extra layer of sweetness and make each piece visually appealing.
Garnished with Mint Leaves
- Top each slice with fresh mint leaves for a pop of color and freshness. The mint complements the fruity flavors and adds an aromatic touch.
Served with Ice Cream
- Pair the pie with a scoop of vanilla or coconut ice cream. The creaminess of the ice cream contrasts beautifully with the lightness of the pie, creating a delightful dessert experience.
How to Perfect Easter No Bake Jello Pie
Creating the perfect Easter No Bake Jello Pie requires attention to detail in every step. Here are some tips to ensure your pie turns out great.
- Choose Vibrant Flavors: Select colorful and contrasting Jello flavors for eye-catching layers. Think lemon, raspberry, and lime for a beautiful visual effect.
- Ensure Proper Chilling: Allow sufficient chilling time between layers; this helps them set correctly and maintain distinct layers without mixing.
- Use Room Temperature Ingredients: Ensure your cream cheese is softened before mixing. This will help achieve a smoother texture in your creamy layer.
- Whip Topping Gently: When spreading whipped topping on the pie, do so gently to avoid deflating it. A light hand keeps it airy and fluffy.
- Keep it Cool: Always keep your pie refrigerated until serving time to maintain its shape and refreshing texture.
Best Side Dishes for Easter No Bake Jello Pie
Pairing side dishes with your Easter No Bake Jello Pie can enhance your meal’s overall appeal. Here are some tasty options that complement this dessert well.
- Fruit Salad: A refreshing mix of seasonal fruits provides a healthy contrast to the sweetness of the pie.
- Veggie Platter: Serve an assortment of fresh vegetables with a tangy dip for a crunchy, savory addition.
- Cheese Board: Offer a selection of cheeses along with crackers and nuts for a sophisticated touch that balances sweetness.
- Spring Green Salad: A light salad with mixed greens, cucumbers, and vinaigrette adds freshness that pairs nicely with dessert.
- Roasted Potatoes: Seasoned roasted potatoes provide a hearty side that works well as part of an Easter feast.
- Grilled Asparagus: Lightly grilled asparagus spears offer a deliciously green option that’s easy to prepare and appealing on any plate.
- Pasta Salad: A cold pasta salad with vegetables and herbs makes for a filling side dish that complements sweet desserts gracefully.
- Deviled Eggs: These classic appetizers are always popular at gatherings, providing savory bites alongside your sweet treat.
Common Mistakes to Avoid
Making an Easter No Bake Jello Pie can be simple, but there are common mistakes that can affect your results. Here’s what to watch out for:
- Using a Warm Crust: Starting with a warm crust can cause the layers to mix. Always ensure your crust is completely cooled before adding any fillings.
- Not Allowing Layers to Set: Skipping the chilling time between layers can result in a messy pie. Make sure each layer is partially or fully set before adding the next.
- Overmixing Cream Cheese: Overmixing can lead to a runny cream cheese layer. Beat just until smooth and fluffy for the best texture.
- Ignoring Flavor Combinations: Using Jello flavors that clash can lessen the taste experience. Choose complementary flavors for a more balanced pie.
- Skipping the Topping: Leaving off the whipped topping misses an opportunity for added texture and sweetness. Don’t forget to add it for a delightful finish.
Storage & Reheating Instructions
Refrigerator Storage
- Store leftovers in an airtight container.
- The pie will stay fresh for up to 5 days in the refrigerator.
Freezing Easter No Bake Jello Pie
- Wrap the pie tightly in plastic wrap before placing it in the freezer.
- It can be frozen for up to 2 months, but note that texture may change upon thawing.
Reheating Easter No Bake Jello Pie
- Oven: Not recommended as it could melt the layers and ruin texture.
- Microwave: Use low heat and warm individual slices for about 10-15 seconds at a time.
- Stovetop: Avoid reheating on the stove; this dessert is best enjoyed cold.
Frequently Asked Questions
Here are some common questions about making an Easter No Bake Jello Pie:
Can I use different flavors of Jello?
Yes! Feel free to mix and match various Jello flavors to create your unique combination.
How long does it take to chill?
The pie needs at least 4-6 hours to chill completely, although overnight is best for optimal texture.
Can I make this pie ahead of time?
Absolutely! This pie is perfect for making ahead of time, allowing you to enjoy it on special occasions without last-minute preparation.
What other toppings can I use?
In addition to whipped topping, consider using fresh fruits or chocolate shavings for added flavor and decoration.
Final Thoughts
This Easter No Bake Jello Pie offers a delightful blend of creamy and fruity textures that make it an appealing dessert for any gathering. Its versatility allows you to customize flavors and toppings according to your preference. Try this recipe today and impress your family and friends with your festive creation!
PrintEaster No Bake Jello Pie
This Easter no-bake Jello pie is a fun, colorful, and refreshing dessert perfect for spring celebrations. With a buttery graham cracker crust and a light, creamy Jello filling, this pie is both easy to make and visually stunning. Its smooth, fluffy texture and fruity flavor make it a crowd-pleasing treat that requires no oven time.
- Prep Time: 20 minutes
- Cook Time: 0 minutes
- Total Time: 4 hours 20 minutes (including chilling time)
Ingredients
For the Crust:
1 1/2 cups graham cracker crumbs
1/3 cup granulated sugar
6 tablespoons unsalted butter, melted
For the Filling:
1 package (3 ounces) flavored gelatin (such as strawberry, raspberry, or lemon)
1 cup boiling water
1/2 cup cold water
1 cup whipped topping (or whipped cream)
For Topping (Optional):
Extra whipped topping
Fresh fruit (berries or sliced fruit)
Sprinkles or Easter candies
Instructions
- In a bowl, mix graham cracker crumbs, sugar, and melted butter until evenly combined.
- Press the mixture firmly into the bottom and sides of a 9-inch pie dish to form the crust.
- Refrigerate the crust for at least 30 minutes to set.
- In a separate bowl, dissolve the gelatin in boiling water, stirring until completely dissolved.
- Add the cold water and stir well. Let the mixture cool to room temperature, but do not let it fully set.
- Gently fold in the whipped topping until smooth and fully incorporated.
- Pour the filling into the prepared crust and smooth the top.
- Refrigerate for at least 4 hours, or until fully set.
- Before serving, garnish with extra whipped topping, fresh fruit, or festive sprinkles if desired.
Notes
Approximately 260 kcal per serving