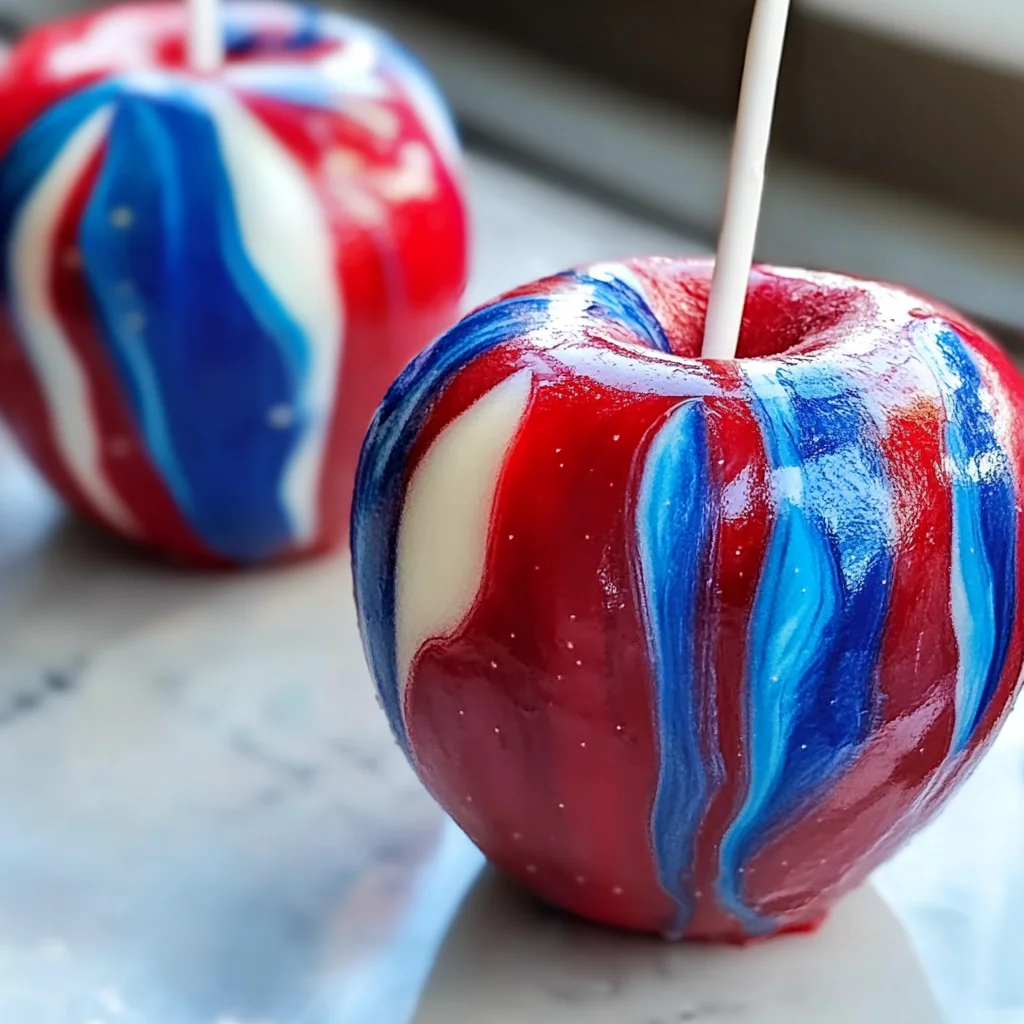
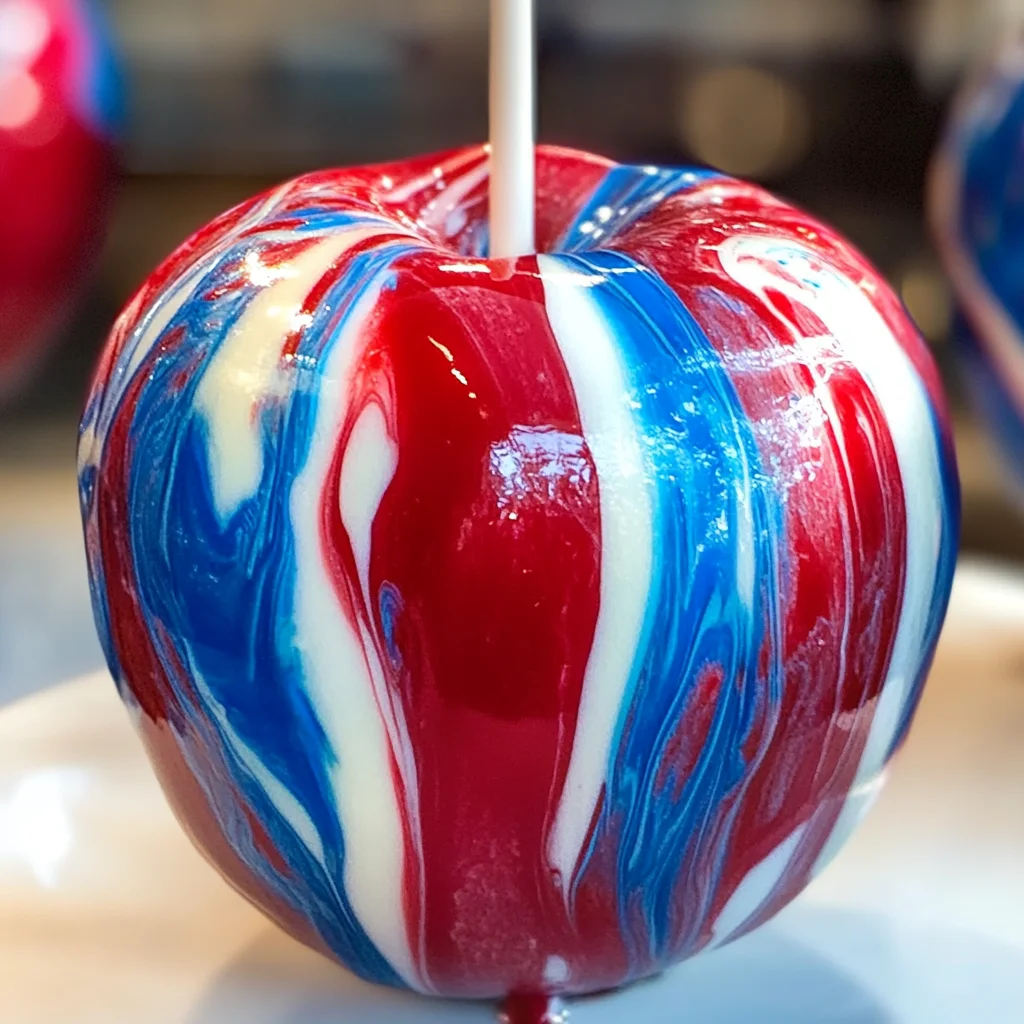
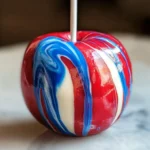
Marbled Effect Candy Apples
Create stunning marbled candy apples with vibrant colors and a glossy finish. These delightful treats are perfect for parties, special occasions, or simply as a fun dessert. The Marbled Effect Candy Apples not only look visually striking but also offer a deliciously sweet crunch that everyone will love.
Why You’ll Love This Recipe
- Visual Appeal: The marbled colors make these candy apples a feast for the eyes, ensuring they stand out at any gathering.
- Easy to Make: With straightforward steps, even beginners can create beautiful and tasty candy apples.
- Customizable Colors: You can easily change the colors using different gel food colorings to match themes or personal preferences.
- Perfect for Any Occasion: Whether it’s Halloween, birthdays, or just a fun family treat, these candy apples fit right in.
- Kid-Friendly Activity: Involve the kids in making these candy apples for a fun and engaging kitchen experience.
Tools and Preparation
Before diving into this sweet adventure, gather your tools to ensure you have everything you need for the perfect marbled effect.
Essential Tools and Equipment
- Heavy-bottomed saucepan
- Candy thermometer
- Wooden skewer
- Parchment paper or silicone mat
- Sturdy wooden sticks
Importance of Each Tool
- Heavy-bottomed saucepan: This ensures even heat distribution, preventing sugar from burning while cooking.
- Candy thermometer: Accurate temperature readings are crucial for achieving the hard crack stage needed for candy coating.
Ingredients
To create your Marbled Effect Candy Apples, here are the ingredients you’ll need:
For the Candy Coating
- 8 medium apples (Granny Smith or Fuji), washed and thoroughly dried
- 2 cups granulated sugar
- 3/4 cup water
- 1/2 cup light corn syrup
- 1/2 teaspoon vanilla extract (optional)
- Red gel food coloring
- Blue gel food coloring
- White gel food coloring
How to Make Marbled Effect Candy Apples
Step 1: Prepare Your Baking Sheet
Line a large baking sheet with parchment paper or a silicone mat. Insert sturdy wooden sticks into the stem end of each apple, ensuring they are securely placed.
Step 2: Make the Candy Syrup
Combine the sugar, water, and corn syrup in a heavy-bottomed saucepan. Stir over medium heat until the sugar completely dissolves.
Step 3: Cook to Hard Crack Stage
Increase the heat to high and bring the mixture to a boil without stirring. Attach your candy thermometer and cook until the syrup reaches 300°F (hard crack stage). Remove from heat immediately once it reaches this temperature.
Step 4: Add Color to Your Syrup
If using vanilla extract, stir it in now. Quickly add several drops each of red, blue, and white gel food colorings. Gently swirl with a wooden skewer—be careful not to fully incorporate; visible streaks will create that beautiful marbled effect.
Step 5: Coat Your Apples
Hold an apple by its stick and dip it into the candy syrup, turning it to coat evenly. Lift it out and let excess syrup drip off before placing it on your prepared baking sheet. Briefly swirl the syrup between dips to maintain the marble pattern.
Step 6: Allow to Cool
Let the apples cool completely at room temperature until the candy shell hardens. This will take approximately 15 minutes. Once set, your marbled effect candy apples are ready to be served!
Enjoy making these delightful treats that are sure to impress!
How to Serve Marbled Effect Candy Apples
Marbled effect candy apples are a delightful treat that can brighten up any gathering. Whether for a birthday party, Halloween celebration, or just a fun afternoon snack, these colorful candies are sure to impress.
Individual Treats
- Serve each marbled apple on its own for a personalized touch, making it easy for guests to grab and enjoy.
Dessert Table Display
- Arrange the candy apples on a tiered dessert stand for an eye-catching centerpiece that showcases the vibrant colors and glossy finish.
Party Favors
- Wrap individual candy apples in decorative cellophane and tie with a ribbon. They make great take-home treats for guests to enjoy later.
Themed Events
- Match the colors of the candy apples with the theme of your event. Use different food colorings to create custom designs that fit your decor.
Pair with Drinks
- Offer refreshing beverages like fruit-infused water or sparkling cider alongside the candy apples to balance the sweetness.
How to Perfect Marbled Effect Candy Apples
Creating the perfect marbled effect candy apples requires attention to detail and technique. Follow these tips to ensure your candy apples turn out beautifully every time.
-
Choose the right apples: Select firm varieties like Granny Smith or Fuji for better texture and flavor that holds up against the candy coating.
-
Dry thoroughly: Make sure to wash and dry your apples completely. Any moisture can prevent the candy from sticking properly.
-
Monitor temperature closely: Use a reliable candy thermometer to ensure your syrup reaches 300°F. This is crucial for achieving that hard crack stage.
-
Swirl carefully: When adding food coloring, gently swirl it into the syrup without fully incorporating it. This creates distinct streaks for the marbled effect.
-
Work quickly: Once your syrup is ready, dip and coat each apple swiftly before it begins to cool and harden.
Best Side Dishes for Marbled Effect Candy Apples
Marbled effect candy apples pair well with various side dishes that complement their sweetness. Here are some delightful options to consider serving alongside:
-
Cheese Platter: A selection of cheeses can balance the sweetness of the candy apples, offering savory contrast.
-
Fruit Skewers: Colorful fruit skewers made with seasonal fruits provide freshness and a burst of flavor alongside the rich candy coating.
-
Popcorn Mix: A mix of sweet and salty popcorn varieties adds crunch and variety, making it an appealing snack option.
-
Veggie Crudité: Fresh raw vegetables served with hummus or ranch dip offer a refreshing crunch that contrasts nicely with the sweetness.
-
Mini Cupcakes: Small cupcakes in complementary flavors can enhance dessert offerings while maintaining a festive atmosphere.
-
Chocolate-Dipped Pretzels: These provide a satisfying salty-sweet combination that pairs wonderfully with marbled effect candy apples.
-
Caramel Sauce: Serve warm caramel sauce as an additional dipping option for those who love extra sweetness on their treats.
-
Ice Cream Bowls: Offer scoops of vanilla or fruit-flavored ice cream as a cool accompaniment to enhance the overall dessert experience.
Common Mistakes to Avoid
To achieve perfect marbled effect candy apples, be aware of common pitfalls. Here are some mistakes to avoid:
- Skipping the drying process: Not thoroughly drying your apples can cause the candy coating to slide off. Make sure to wash and dry them completely before starting.
- Using the wrong type of apples: Some apple varieties do not hold up well under heat or don’t have the right balance of sweetness and tartness. Stick with Granny Smith or Fuji for best results.
- Not monitoring the temperature: Failing to reach the correct candy temperature (300°F) can result in a sticky or too soft coating. Always use a reliable candy thermometer.
- Overmixing colors: Mixing food coloring too much will eliminate the marbled effect you desire. Swirl gently to maintain visible streaks.
- Dipping at an angle: Dipping your apple at an angle can lead to uneven coating. Hold the apple straight while dipping for an even layer of candy.
- Skipping cooling time: Not allowing enough time for the candy to set can lead to messy results. Let your apples cool completely at room temperature before serving.
Storage & Reheating Instructions
Refrigerator Storage
- Store marbled effect candy apples in an airtight container.
- Keep them in the refrigerator for up to 1 week.
Freezing Marbled Effect Candy Apples
- Freezing is not recommended as it may affect texture and appearance.
- If necessary, wrap each apple tightly in plastic wrap before placing them in a freezer-safe container.
Reheating Marbled Effect Candy Apples
- Oven: Preheat to 200°F and place apples on a baking sheet for a few minutes until just warm.
- Microwave: Use low power settings and heat in short intervals; watch carefully as they can melt quickly.
- Stovetop: Place apples in a pan over low heat, turning occasionally until warmed through.
Frequently Asked Questions
Here are some common questions about marbled effect candy apples:
What are Marbled Effect Candy Apples?
Marbled effect candy apples are coated apples featuring colorful swirls of candy that create a beautiful visual effect, making them perfect for parties and celebrations.
How do I make vibrant colors for my candy apples?
Use gel food coloring as it gives intense colors without adding excess moisture. Add drops to your syrup and swirl lightly for best results.
Can I customize my marbled effect candy apples?
Absolutely! You can experiment with different colors or add sprinkles after dipping for extra flair.
How long do marbled effect candy apples last?
These treats will last up to one week when stored properly in an airtight container in the refrigerator.
Are marbled effect candy apples suitable for kids?
Yes! They are fun and colorful treats that kids will love, making them great for parties or special occasions.
Final Thoughts
Marbled effect candy apples are not only visually stunning but also deliciously sweet, making them a fantastic treat for any gathering. Their versatility allows you to customize colors and decorations based on your event theme. Try this fun recipe today and enjoy creating these delightful desserts!
Marbled Effect Candy Apples
Create stunning Marbled Effect Candy Apples that are as delightful to look at as they are to eat. With their vibrant colors and glossy finish, these candy-coated treats are perfect for any celebration, be it a birthday party, Halloween gathering, or a fun family dessert night. Easy to make and customizable with a variety of colors, this recipe is a great way to involve kids in the kitchen, turning candy apple preparation into a fun activity. These sweet creations not only satisfy your sweet tooth but also serve as an eye-catching centerpiece for your dessert table.
- Prep Time: 15 minutes
- Cook Time: 10 minutes
- Total Time: 25 minutes
- Yield: Makes 8 servings 1x
- Category: Dessert
- Method: Candy making
- Cuisine: American
Ingredients
- 8 medium apples (Granny Smith or Fuji), washed and thoroughly dried
- 2 cups granulated sugar
- 3/4 cup water
- 1/2 cup light corn syrup
- Red gel food coloring
- Blue gel food coloring
- White gel food coloring
Instructions
- Line a large baking sheet with parchment paper and insert sturdy wooden sticks into the apples.
- In a heavy-bottomed saucepan, combine sugar, water, and corn syrup; stir until dissolved.
- Cook over high heat until the syrup reaches 300°F (hard crack stage).
- Remove from heat and quickly add gel food colorings, swirling gently for a marbled effect.
- Dip each apple into the syrup, allowing excess to drip off before placing on the prepared baking sheet.
- Let cool completely until the candy shell hardens (about 15 minutes) before serving.
Nutrition
- Serving Size: 1 candy apple (approx. 127g)
- Calories: 250
- Sugar: 58g
- Sodium: 0mg
- Fat: 0g
- Saturated Fat: 0g
- Unsaturated Fat: 0g
- Trans Fat: 0g
- Carbohydrates: 64g
- Fiber: 1g
- Protein: 0g
- Cholesterol: 0mg